Thursday, December 15, 2011

Green, White & Red...

So time for another lot of christmas nails.  This time I had the idea of presents & luckily had the Konad plate to go with it.

I used Christmas colours as my base coats, two red, two green & one white nail.  I used a cheap red from Korea called Dear Face (gotta love their use of English).


W2000 (korean won)

For the white & green I used the konad polishes (although you're not technically supposed to use them as base coats.  It doesn't specify why, but from experience I'd say its because their thicker & take way longer to dry).

The plate is Konad M65, sorry for the crappy picture, there hasn't been a nice sunny day to take pictures yet (so much for a hot kiwi christmas!).


I used the striped looking whole nail plate.

I used multi colours for stamping each nail too & on the middle white nail I used Konad Wine Red, Green special polish & Gold special polish.


Konad wine red (it doesn't come out this dark, but it tends to look like black in the bottle).
W4000 (Korean won)


Konad special polish, white.
$5.99 NZ


Konad special polish green.
(which I also used as a base coat)
$8.99 NZ


Konad special polish Gold.
$8.99 NZ

Those last two polishes are a pre christmas present myself as I realized I was missing two vital christmas colours for stamping my nails :)

Anyway here is the finished product:


I blobbed Green, Red & Gold onto the plate & it seemed to work out okay.


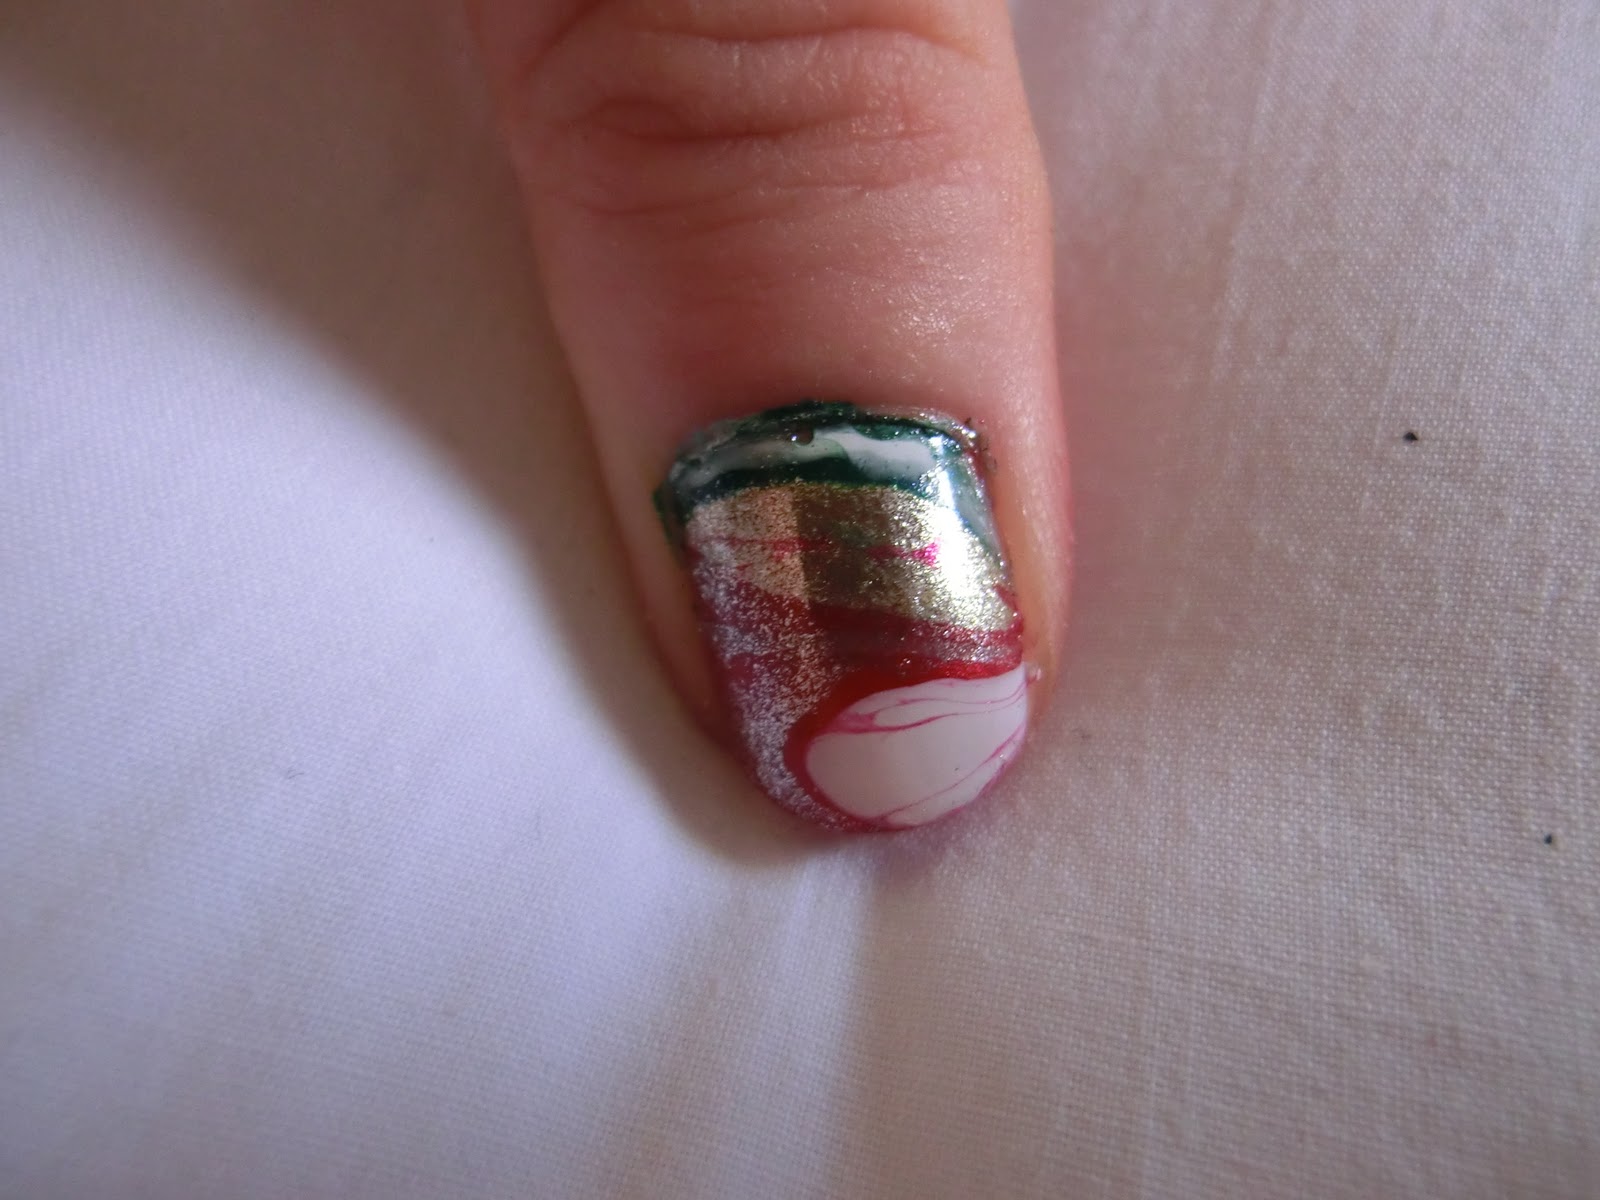
Close up of my thumbs (these are using a mix of Konad plate M12 & Bundle Monster plates BM-213 & Bm-225)
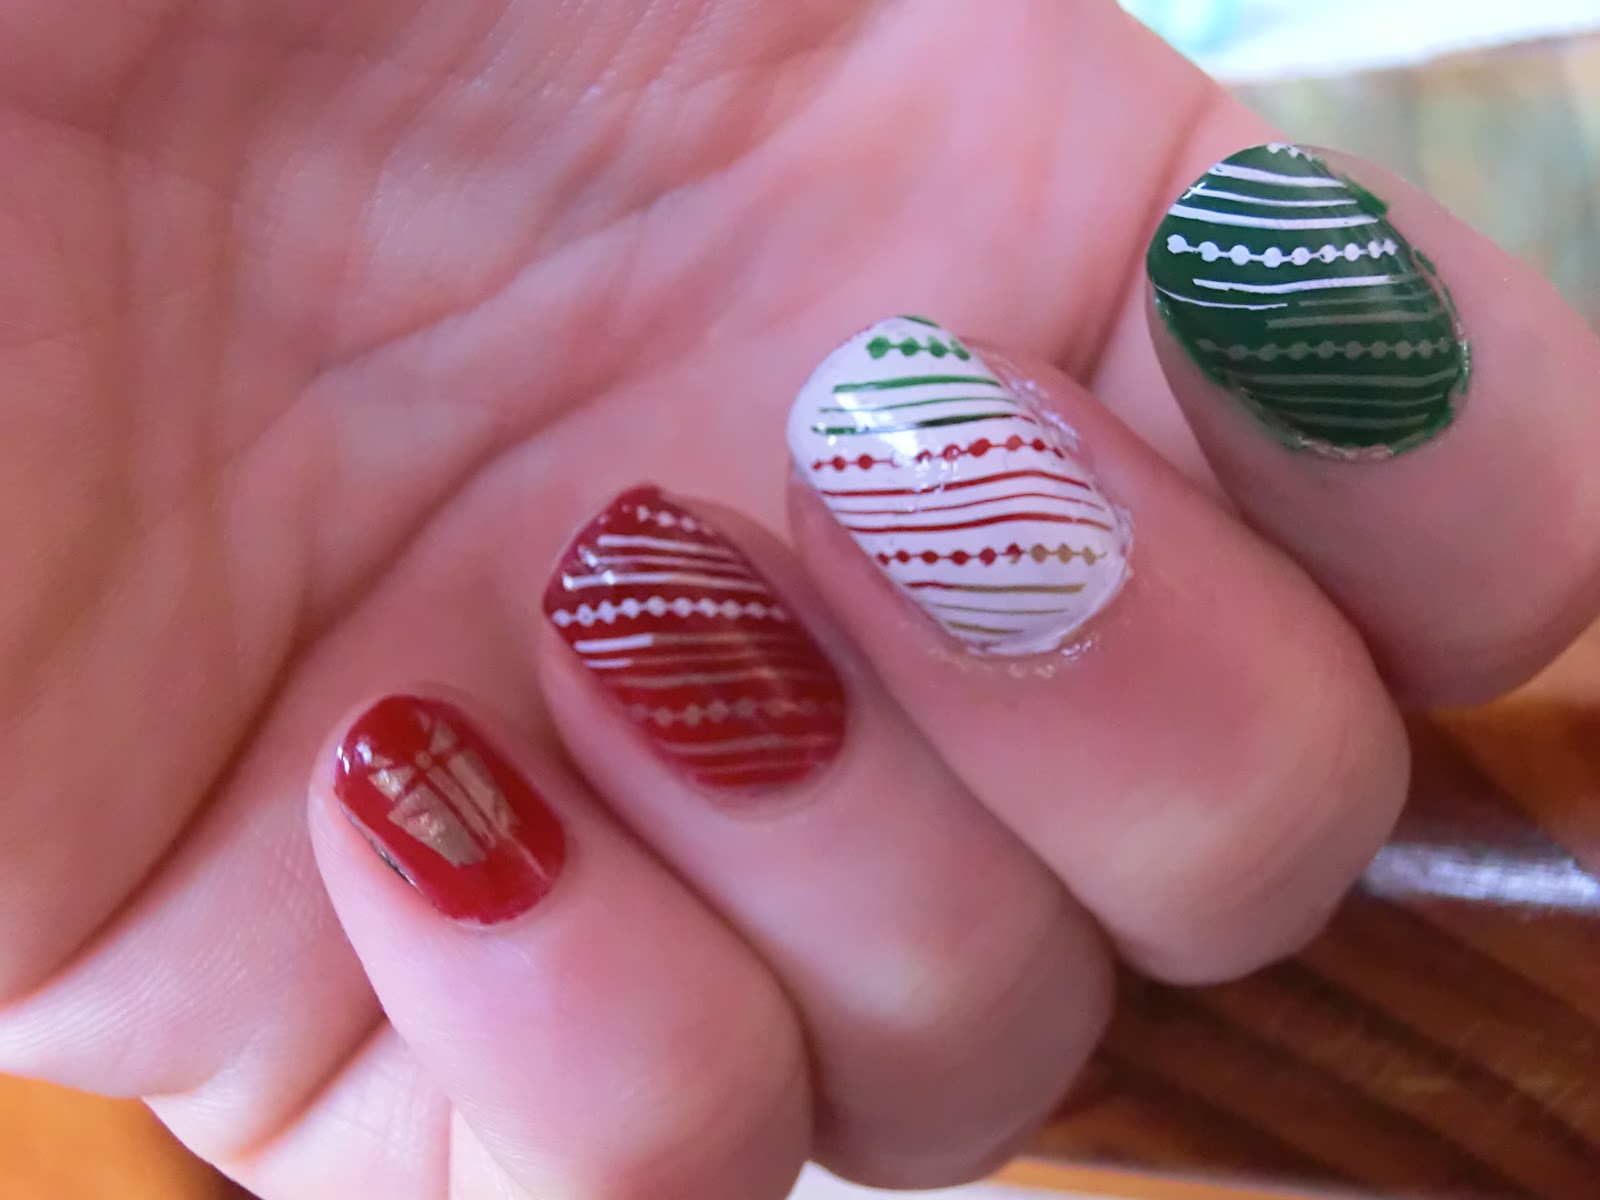

So christmasy!


And view of all my nails & yes I have painted my toes to match :)


Till next week (with yet another set of Christmasy nails)

Nikki
:o)

Saturday, December 10, 2011

Red, White, Gold & Green - Christmas Swirls...

Its December - yay! Cause that means 4 weeks of christmas nails :) I had wanted to try out water marbling on my nails for a while so after checking out a few blogs & youtube videos I decided to give it a go.

The first attempts weren't so flash - its harder than it looks!  Here's a run down of a steps I took.

Tools I used


Masking tape + skewers (tooth picks will do but we didnt have any)


plastic cup (or something that it won't matter if it gets nail polish stuck to it) half filled with water.  And of course a piece of newspaper or cardboard to catch any drips.  Also use a table or stable surface, I used my bed & every time I moved, so too did my design floating on the water!

My Christmas colours:


A mixture of expensive & cheap.  The two revlon ones worked best, although cause their were quite thin they spread quickly.  The green was a cheapy from the Korean chain shop, Skin Food & the white is from a french manicure set by Kiss.

Step 1.
Tape masking tape around your nail as close as you can (I used about 4 pieces).  Any skin you miss will be covered in nail polish so tape well :)


Step 2.

Drop colours in one at a time inside one another to create a bulls eye.  I had to play around with this due to the different thickness of the nail polishes.  Also you need to do this fast otherwise the nail polish sets & when you try to stir it, it sticks to the toothpick.

Step 3.

Create pretty swirly patterns using the toothpick.  You don't have to make many lines, as too many may 'burst' the outer edge of the polish & it will get very messy looking.


Step 4. 

Dip your taped up finger into the water.  Once you've submerged your finger, use the toothpick to collect all the extra polish that's floating on the water still otherwise it will recoat your nail as you pull your finger out.  Found out that the hard way :/


Step 5.

Remove the tape once dry & add a top coat to seal in the colour.  The other thing I did was touch up the gold on a few of my nails as it spread a bit too thin on the water so didn't coat my nail very thickly.


Now I have to confess this was the first nail I did & I was quite impressed with it.  Sadly the rest of my nine nails didn't look half as good as you can see below


They look marbled, but not exactly pretty!

So I had another try the next day and they turned out much more to my liking


I didn't use white & had to repaint the gold but at least they looked christmasy this time!


Till the next set of Xmas nails
Nikki :o)